ArhiNet
Integrated System for developing semantically-enhanced archive content
Research Project 11-051/2007 CNMP, Program 4 – Research partnership for priority domain
|
ArhiNet Integrated System for developing semantically-enhanced archive content Research Project 11-051/2007 CNMP, Program 4 – Research partnership for priority domain
|
|
|
To install the authorization certificate follow the next steps: 1. Download the UIMockupKey.pfx certificate from the following address: http://coned.utcluj.ro/ARHINET/cert/UIMockupKey.pfx. When you access this address the window below will be displayed in which you have to select the radio button with the label "Save File" and then click on the "OK" button.
Figure 1. The window for saving the UIMockupKey.pfx certificate After you click on the "OK" button in the window from figure 1, the window from figure 2 will be displayed. In this window you have to select a location (a folder) on your computer where you want to save the certificate. After selecting a location click on the "Save" button.
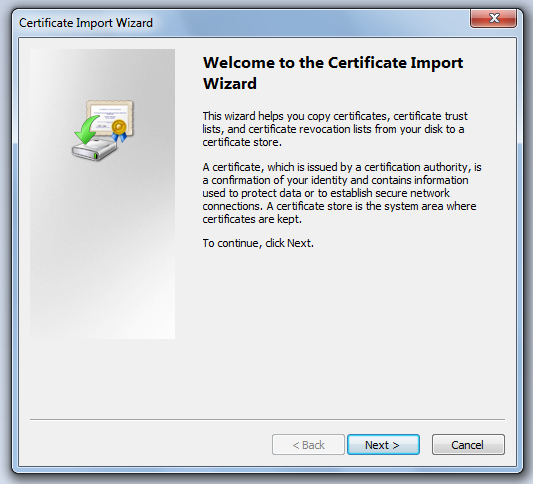
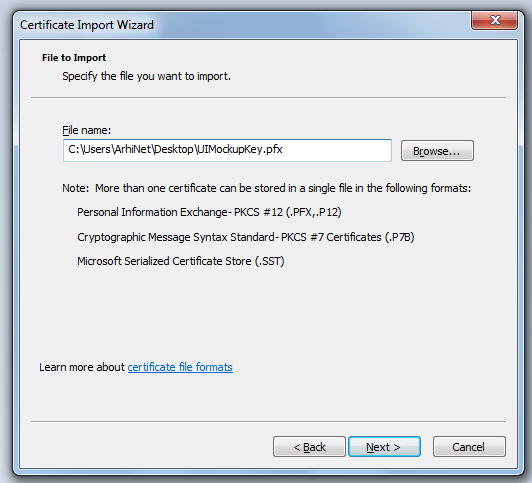
Figure 2. The window for choosing the location on the computer where you want to save the certificate 2. Locate the UIMockupKey.pfx certificate in the folder chosen in the previous step and double click on it. The window in figure 3 will be displayed where you just have to click on the "Next" button. 3. The window from figure 4 is displayed. Here you should normally select the certificate location, but in this case this location is displayed implicitly so you do not have to modify it. Click on the "Next" button.
Figure 4. The window for installing the certificate - choose the location where the certificate has been downloaded 4. The window in figure 5 is displayed where you have to insert the "arhinet" password and then to click on the "Next" button.
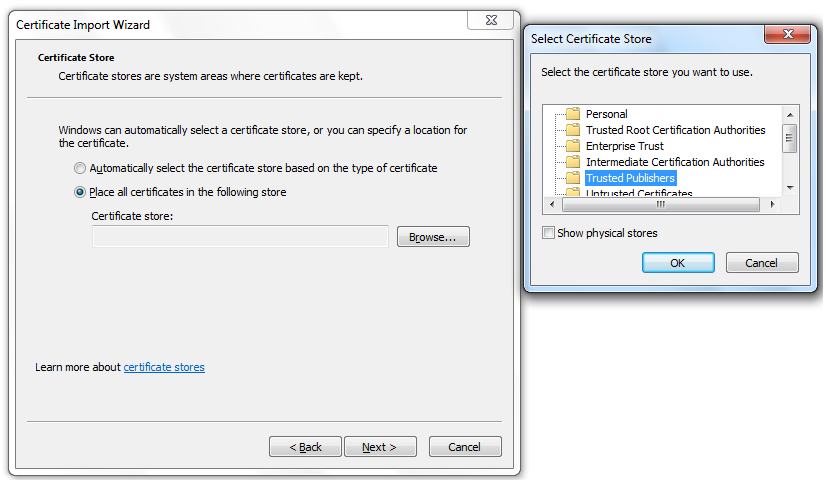
Figure 5. The window for installing the certificate - insert the certificate password 5. The window in figure 6 will be displayed where you first have to select the radio button with the label "Place all certificates in the following store" and then to click on the "Browse" button. A window entitled "Select Certificate Store" will be displayed where you have to choose the option "Trusted Publishers" and then to click on the "OK" button. Click on the "Next" button.
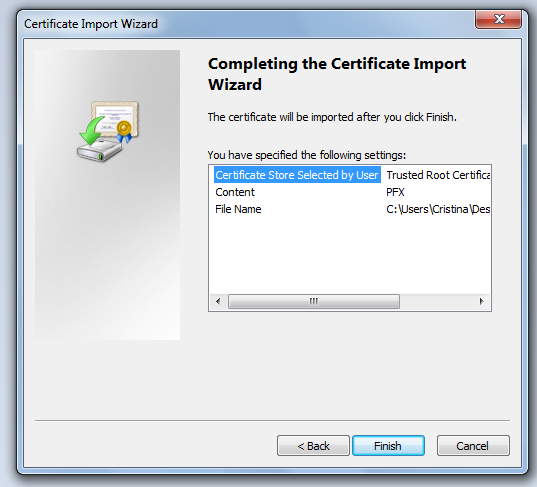
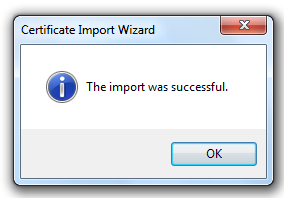
Figure 6. The window for installing the certificate - select the option "Trusted Publishers" 6. The window in figure 7 is displayed where you just have to click on the "Finish" button. 7. If the certificate has been successfully installed for the "Trusted Publishers" option the following confirmation window will be displayed:
Figure 8. Confirmation window 8. Locate the UIMockupKey.pfx certificate in the folder chosen at step 1 and double click on it. The window in figure 9 will be displayed where you just have to click on the "Next" button.
9. The window from figure 10 is displayed. Here you should normally select the certificate location, but in this case this location is displayed implicitly so you do not have to modify it. Click on the "Next" button.
10. The window in figure 11 is displayed where you have to insert the "arhinet" password and then to click on the "Next" button.
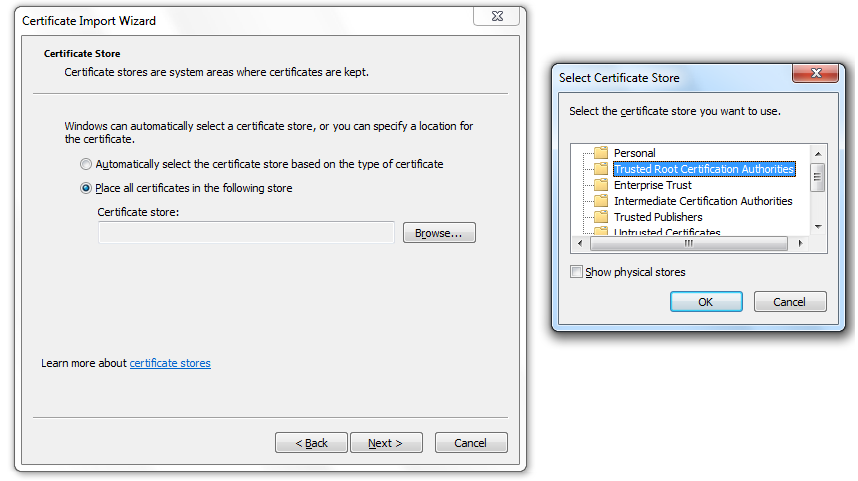
Figura 11. The window for installing the certificate - insert the certificate password 11. The window in figure 12 will be displayed where you first have to select the radio button with the label "Place all certificates in the following store" and then to click on the "Browse" button. A window entitled "Select Certificate Store" will be displayed where you have to choose the option "Trusted Root Certification Authorities" and then to click on the "OK" button. Click on the "Next" button.
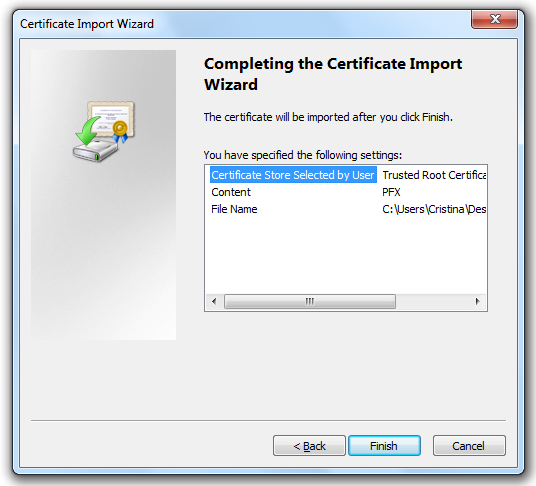
Figura 12. The window for installing the certificate - select the option "Trusted Root Certification Authorities" 12. The
window in figure 13 is displayed where you just have to click on the
"Finish" button.
Figure 13. The window for installing the certificate - completing the certificate instalation for the "Trusted Root Certification Authorities" option 13. If the certificate has been successfully installed for the "Trusted Root Certification Authorities" option the following confirmation window will be displayed:
Figure 14. Confirmation window Technical University of Cluj-Napoca
Str. Constantin Daicoviciu nr 15, 400020 Cluj - Napoca, Romania phone +4 0264 401 200, 401248, phone/fax +4 0264 592 055 |
|